Sep 30 2008
Sneakin’ Another Blog Candy Peek! * Vintage Teddy Bear Friend
We all have our favorites … songs, colors, foods, seasons, friends, comforts, blessings, books, scriptures, memories, etc. One of the upcoming Hanna Stamps sets is called “Vintage Toys“. Well, you guessed it. One of my all-time favorites (toys, comforts, and silent friend) is my old brown teddy bear. I’m sure it was my teddy who helped me learn to sleep alone on stormy nights upstairs. I’m also pretty sure that he heard me talk & talk when we were supposed to be going to sleep … countless times. So naturally, the teddy bear is probably my favorite stamp from the new Vintage Toys set. However, you’ll also find jacks, a great toy airplane, a toy soldier, and more! But, you’ll need to check out the Hanna Stamps birthday party tomorrow night to see them all!
 My original teddy is nubby brown, and I wanted a bit of texture for this one. I used a technique I learned a few years ago at a regionals event for SU, faux suede. It’s very easy, and seemed like just the right idea for an old stuffed bear. Start with a generous piece of cardstock, larger than
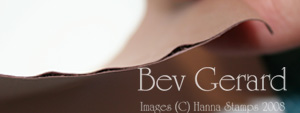
 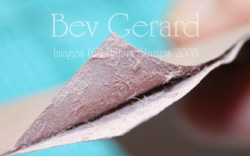 your intended stamp. Now we’ll break down the paper fibers by repeatedly running the cardstock across a rigid edge, such as your bone folder, or a countertop edge, or through your paper crimper many times. Your looking for a new, softer texture to the cardstock … soft, very pliable, and you’ll notice the layers on the paper edge begin to pull apart as shown. Now, carefully pull the two layers of c/s apart. Here’s the nubby, new texture! Because this
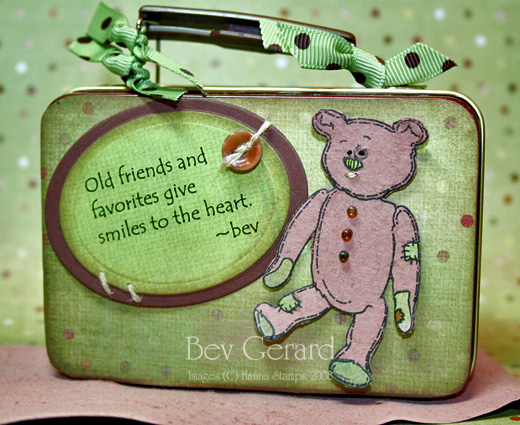
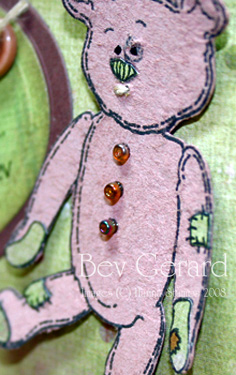
 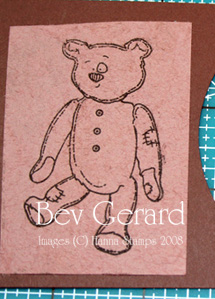 paper is now half as thick as it was before, I used liquid paper glue to completely adhere the faux suede to another piece of cardstock … just for stability. I’m cutting out the bear image, so I need it to be strong. After just a few minutes for drying, stamp your desired image atop the faux suede, cut it out, and decorate as desired. Ta-dah! I added some paper-piecing ‘patches’, 3 small beads, and finally a tiny stitch of linen thread for his mouth. A couple of dots from a glaze pen enhanced his eyes.
.
The tin is one of a few I found last year at the Target dollar spot. It was so easy to alter with paper and my ATG adhesive. The handle was easily removed for papering the tin, then reattached in a jiffy. Tex’s Tip: Pssssst! Check your tins to see if the handles can be removed. If the little flaps are just bent over on the inside, lift them with a thin screwdriver, alter the tin, and reinsert!
 Remember! You can leave a comment here for Wednesday’s chance at our delightful Hanna Stamps blog candy, if you haven’t already! Wednesday is the final day of blog hopping comments for the brand new Riley or Sophie stamp. Remember, all design team members will be giving away a free stamp at the birthday party Thursday night! You have several chances to win by visiting each of us with a comment Monday, Tuesday, and Wednesday! Good luck! Here are the Hanna Stamps Design Team Members for your blog-hopping pleasure!
~
~
~
~
~
~
Hanna Stamps Team
Adela – Creations by AR
Amanda – Inkspirations
Beth – Freckled and Fun
Bev (Me!) – Savor the Journey
Cambria – Stamp a Little Love Baby
Candice – Rubber Soul
Cindy – Cindy Haffners’s Corner
Frances – Stamp Owl’s Studio
Janette – Stampin with Style
Jeanne – Inky Paws
Judy – Rock is Dead
Kendra – Paper Dreams
Kittie – Kittie Kraft
Niki – My Paper Creations
Pam – Iris Garden
Patti – Design {U}
Shannon – Live, Love, Laugh & Stamp
Vicki – DT Coordinator Extraordinaire – Summerthyme Studio
Kristi – Owner & Sweet Thang – Kreations By Krissy
~
Project Materials: STAMP: Vintage Toys . (Sentiment was computer-generated.)
INK: Palette Noir Black, Copic E25, Ranger Distress Ink – Frayed Burlap.
PAPERS: My Mind’s Eye – Green Small Dots, Earthtone Stripes, and Textured Lime. SU Close To Cocoa & Chocolate Chip.
ACCESSORIES: Spellbinders Oval Nestabilities, Diamond Glaze, tweezers, beads, SU Linen Thread, needle, Junkitz Button, May Arts Ribbon, small tin, printer. ~
Thanks, everyone!
Bev
49 responses so far


This teddy is so cute!
So adorable. Love how you made him velvety.
Thanks for explaining your technique. This is not one I’ve seen before. Very cute teddy…Cheryl L.
Oh I love what you have done here!!!!
OMGosh!!! LUV THE TIN ! And your teddybear turned out soooooooo great!
Love this, Bev! You are so amazing! Love all your tiny careful details and your sentiment is great! Did I mention ‘I Love It?’ 🙂
Bev, you are just so creative! My goodness this is just adorable. Who would have ever thought to “peel” the paper for this look. Thanks for the detailed info! I love it Bev.
Joan
I just love this project. You are so creative and inspiring. Love all the details you added. Thanks for a chance.
Love the teddy bear, so cute 🙂
this is darling!!
How cute is he! He looks so real, good job on that!
Thanks for sharing – nice job, love the soft soothing colors!
Sandra
What an adorable teddy! Love the card!
SUCH a great little tin. Love the bear … I haven’t used faux suede in a while either, but it works perfectly with this image.
Adorable – love the faux suede technique!
This is just too cute!!! Can’t wait for this release!
Aww so cute…
I love the tin and the cute bear!
that teddy is precious! and I’d forgotten about that technique, so thanks for the reminder!!
Love the technique with this stamp! Cute card!
This is so so cute – can’t wait for the release
Great idea to do the faux seude. It looks perfect and I love the little beads!
Cute tin, great job. 🙂
Love it, I love items that go beyond a card. So cute!
Wow – thanks for the detailed tutorial on how to replicate your cool bear.
Wow, such a cute project and TFS the technique on the teddy, looks great! I’ll have to give it a try!
Adorable!!!
That little bear is just adorable! Love the colors you chose!!
this is sooooooooooooooooooooooooo cute!
This is awesome, Bev!! Great idea for the texture of the bear, and I love all of the dimension!! Adorable!!
Love the fuzzy look of the bear.
Robbie
Nice! I like the green-brown combination! Greetings from Belgium, Annelies
Love the bear, he looks very loved also.
Love this bear. He looks just like my first teddy.
CUTE BEAR!!
Michelle
What a fab idea! It really brings the teddy ‘to life!’
Great work! I love this teddy stamp!!
What a cute bear! This is an awesome card!
Very neat card! Thanks for sharing your creation!!
What a great idea to give the bear some texture!
I Love the Riley stamps!
Rock on!
Happy Birthday Hanna Stamps! lol
I love this teddy bear!! I love what you did with it too! Thanks for sharing! Have a great night and take care!
Oh how cute!!! I’m bookmarking this one so I can try this technique.
Love the new stamps!
Jacqueline
This is so wonderful! Your bear turned out amazing!!
What a great way to get texture. Can’t wait to see thw whole set.
What a great idea. The bear is very cute.
That is a great technique! so cute.
Oh my gosh – I loved the tip on making the Teddy textured!!